
Like a lot of plugins, Sports Bench does a lot for your site. But it might not be a one-size-fits-all plugin for you, especially when it comes to styling. Maybe you want a different color here, a different font there and that image to be a bit bigger.
I talked a bit before about how you can customize with Sports Bench, both in the styling and functionality. But Sports Bench 1.5 provides a great boost in your ability to customize the styling. And I want to make sure you’re aware of it so that your life is easier.
Customizing styles in your theme
Customizing styles used to be a bit of pain in previous versions of Sports Bench. Because plugin styles are loaded after theme styles, they tend to overwrite anything you were to put inside of your CSS files unless you used !important.
But with Sports Bench 1.5, making those style changes will be much easier. All you need to do is to create sports-bench directory in your theme’s main directory. And then inside of the new directory, create a custom.css file and fill it with your custom styles.
Sports Bench will then take that CSS file and load it after all of the Sports Bench styles, meaning that it will overwrite the default styling from the plugin.
And to find out what CSS selector(s) to use, you can right-click on the element whose style you want to change and then click “Inspect”, “Inspect Element” or something similar. Then you should be able to find the CSS selectors for you to use.
Customizing with child theme
Now, what if you’re using the Sports Bench theme in addition to the plugin. Well, you can technically use the method described above. But the best plan of action is to get a step further.
You’re first going to want to create a child theme if you haven’t. Really, this is a good tip to follow if you’re not using a custom theme. That way your added customizations don’t get overwritten by a theme update.
So, create a new theme in the themes directory on your site. You can name it basically anything you want, but the best naming might be sports-bench-child (or {parent theme slug}-child). Then create a function.php file and a style.css file. In the style.css file, add this code.
/*
 Theme Name: Sports Bench Child
 Description: Child theme for Sports Bench theme
 Author:
 Template: sports-bench
 */
Then in the functions.php file, add this code.
/*
 * Enqueues child theme stylesheet
 */
 function sportsbenchchildthemestyles() {
 wpenqueuescript( 'menucss', getstylesheetdirectoryuri() . '/sports-bench-child-menu.js', array( 'jquery' ), '', true );
 wpenqueuestyle( 'maincss', getstylesheeturi() ); } addaction( 'wpenqueuescripts', 'sportsbenchchildthemestyles', 10000);
Now you have a working child theme. You can now add the sports-bench directory and then the custom.css file and your custom CSS.
Customizing Sports Bench functionality
Finally, I do want to note that the way for customizing the functionality of Sports Bench remains the same as the last time I wrote about customizing the plugin.
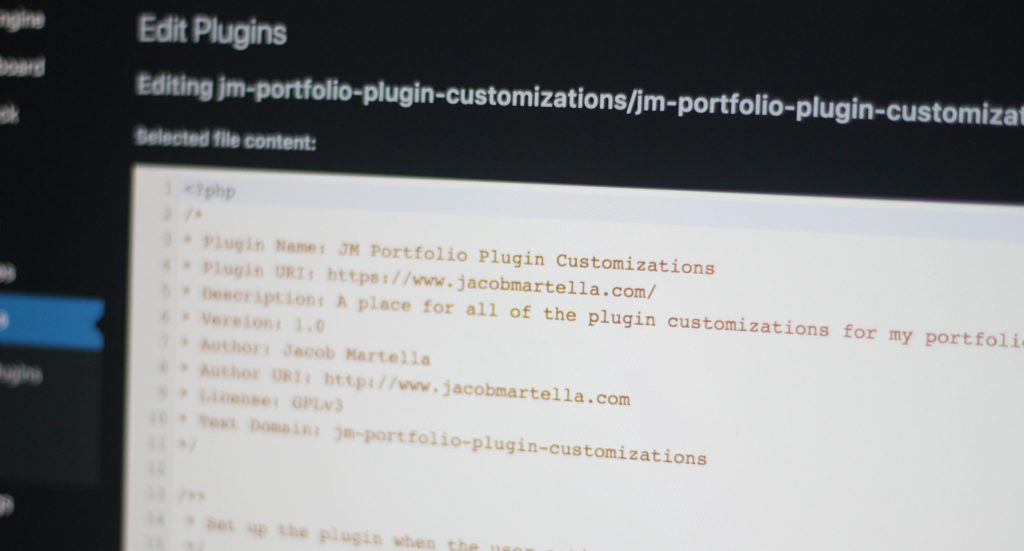
You’re going to want to create a custom plugin to add in any extra functions, JavaScript and the like. You can name it Sports Bench Customizations or anything really. All you need is a PHP file that has the same file name as your plugin directory slug. And then it basically becomes a functions.php file that will never go away when you change themes.
You could also add functionality to the plugin via your theme; however, just be aware that if you change themes and don’t move your added Sports Bench functionality, you will lose it.
So I hope this helps you as you develop with Sports Bench. As always, if you have any questions, feel free to leave them in the comments below or you can ask them in the Developing with Sports Bench forum.

Leave a Reply