Sports Bench makes it easy to enter in stats for games in your league. But what if you have a lot of data from previous seasons that you need to upload? How do you do that without having to enter it by hand?
Fortunately, Sports Bench takes care of that for you. Sports Bench 1.3 introduced an import feature so you can import all of your data for each of the tables.
The process can be a bit tricky, especially the first time you do it, so here’s a hand guide to help you out.
Column headings
So the first thing you need to do is to get your data into a CSV files. Hopefully wherever you’re importing the data from already has it in a CSV files, but if not, you can create one using Microsoft Excel or Google Sheets.
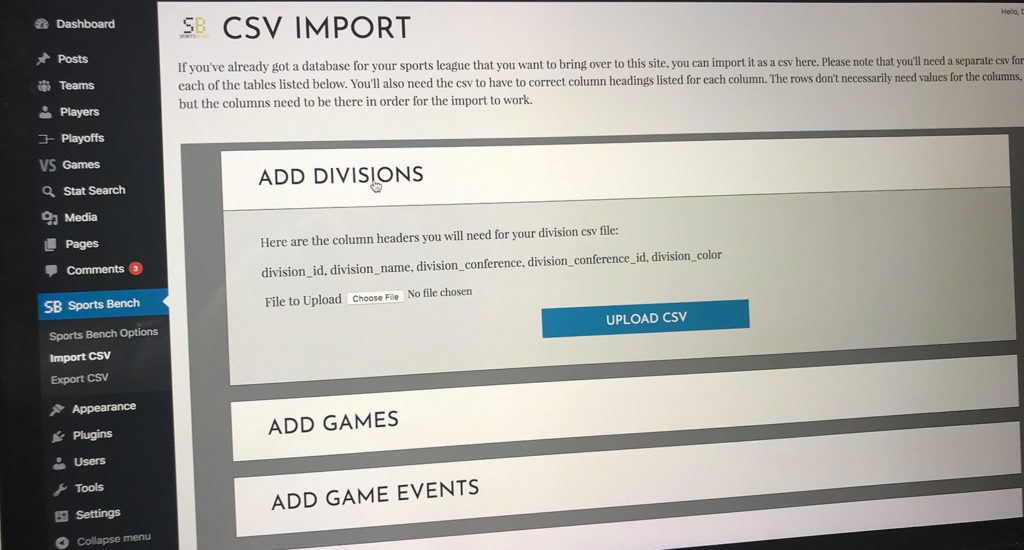
No matter where the data is coming from, you do have to make sure that the column headings are identical to the ones that are in Sports Bench. You can find the column headings needed for each table by going to the import page inside your admin menu on the left.
Each row doesn’t need to have data for each column, but the columns have to be there in order for the import to work.
Table data
The next part of the puzzle is making sure that the data is correct for the column that it’s in. For the most part it’s pretty simple but there are a few spots that can be tricky.
The first, and probably biggest, problem you’ll encounter is with the game date and time. The date and time for each game has to be in the correct timestamp format in order for it to work as it should on the front end. The format you need is YYYY-MM-DD HH:MM:SS. So a real example would be “2018-08-19 13:04:43”. Also note that the time needs to be in the 24-hour setting and not the 12 hour used a lot in the U.S. and Canada.
Another tricky spot will likely be around game and team ids. Technically you can upload teams, games and players (and the other tables for that matter) without a value for their respective primary keys (team_id, game_id, player_id, etc.). But that can cause an issue if you’re importing game stats data as well. If you already have games and teams that have ids, make sure those values are filled out before you import the data.
Saving as a CSV
Finally, before you upload, you need to save the file as a CSV. This is the simplest part of the process. Simply hit “Save As” and select Comma Separated Values or CSV. If you’re using Excel, make sure to select the normal one and not one that has Windows or MS in front of it.
Then go to the Sports Bench import page in the admin area, select the table you’re importing and import the data. Now you don’t have to enter in all of those values by hand. And you’re ready to get going with your league.


Leave a Reply